The final modified "finder scope now a guide scope"
Original Finder scope 50mm
How to DIY Finder Scope to Guide Scope Conversion for an Explore Scientific 50mm Guidescope
I wanted to make a guide scope out of the standard (and basically useless) Explore Scientific 50mm white guide scope that comes with most of their telescope (at least the 127mm model I got).
Useless because the crosshairs are invisible unless you are pointing it at the Moon or something equally bright.
But if you are doing astrophotography you need a
guide scope not a finder scope.
Sure you can buy one but wouldn't it be great if you could re-purpose the standard guide scope?
Please read ALL the instructions below BEFORE attempting this easy conversion!
* Unscrew the eyepiece end of the finderscope
The interior diameter of the white tube is just a couple of mm wider than a standard 2" to 1.25" eyepiece adapter.
NOTE: The eyepiece adapter MUST have a very low "stop" when you put it into the white tube. The best one I found in my astro scrap pile (yes, never throw anything away, you never know when you will need it!) has only about a 2 mm "stop" that keep the adapter from going all the way into the white tube.
My junk box adapter has the eyepiece screw below the "stop". Most do not, however.
Most 2" to 1.25" eyepiece adapters have a THICK "stop" and that complicates matters because you will have to CUT the white tube down by the thickness your "stop" is in order to have any chance at reaching focus on your guide camera. So if your adapter is 10mm thick then you will have to chop off 10mm with a metal saw, keeping it as true to "level" as possible. Of course you may have to insert some kind of wooden dowel that is 2" in diameter into the white tube to keep it from warping in the process of cutting. I suggest that you test it first by taping it all together and testing it with your guide camera before cutting.
In my case I had to drill a hole (or may be two if your eyepiece adapter requires it) at the proper distance from the end of the white tube, a hole big enough for the screw(s) to hole an eyepiece or a guide camera in place.
However if your adapter is a thick one, the holding screw will not be necessary.
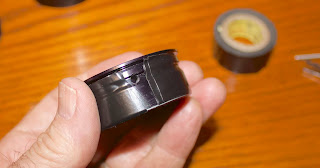
You will find that with just three layers of black electricians tape around the eyepiece adapter will make it fit snugly in. If after testing you decide you are "never going back to a finder scope" you might want to epoxy it in place permanently. Your choice...
Temporarily, especially for testing, I only held the whole eyepiece assembly in place with electrician's tape.
Now for the focusing test. I inserted an Astromania SGCMOS Series Telescope CMOS Camera (a ZWO ASI120MM Mini Monochrome Astronomy Camera will do just fine, too. Google this model.)
Hooking the camera up to my computer I had to vary the amount that I inserted the camera barrel into the eyepiece adapter so I could reach
basic focus.
Then I made the final sharp focus by twisting the objective lens at the other end of the finder scope then locking it in place with the smaller black ring.
Because I didn't have to cut the white tube (just drill a small hole) I was able to keep the original threads inside white tube and screw in the original eyepiece end. But I will likely never need to.
And just like that, you have repurposed your finder scope into a guide scope!


