I purchased this solar filter from ExploreScientific and it was well packaged.
Sun Catcher Variable Large Aperture Solar Filter for 7" to 12" diameter.
However I found that I could adapt it with the included parts to fit a 6" diameter telescope with no problem!
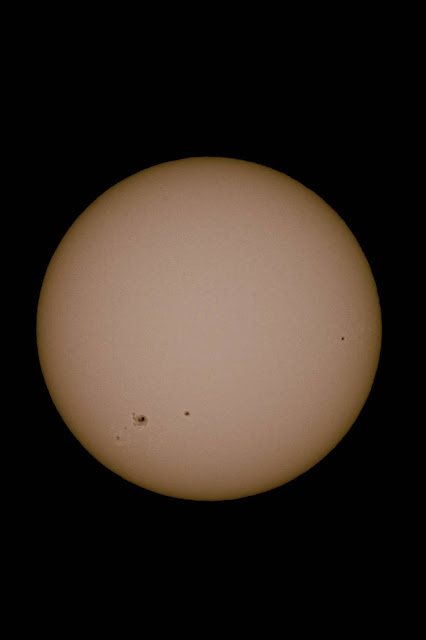
This filter is what they call a "white light" filter not a hydrogen alpha filter (those are very expensive comparatively). Looking through this filter at the Sun will give a pleasing orange cast.
NEVER ATTEMPT TO VIEW THE SUN WITHOUT a filter that is compliant with the ISO 12312-2 safety standard ! This filter is compliant. However if this filter gets a hole in it or a tear DO NOT USE IT!
As with all filters you need to avoid touching it with your hands or sharp objects. For storage I find that the box it was shipped in will work very well for storing the filter when you have completed its assembly.
The instructions that came with the filter were a bit confusing (no words, just so-so drawings) and the filter does need some assembly.
So I present this as an alternative to those instructions.
NOTE: While this filter is typically meant to fit only one telescope I wanted it to fit several of different diameters of telescopes as I have an ExplorerScientific AR-127 (an achromatic refractor with a 5" lens but the lens hood is much larger). I also have a Celestron 6SE SCT ota which just happens to have the same exterior diameter as the AR-127. And then I have a Meade 8" SCT ota which has a much larger diameter.
STEP 1: Place the filter holder face down on the table on top of the same plastic that it came shipped with. Then cut the "instructional" paper along it's hexagonal lines and put it inside the filter holder (see pics). This is to protect the solar filter from unwanted scratches when putting this together.

STEP 2: Placed the triangular pieces of fairly stiff black foam on top of the paper..
STEP 3: Carefully place and center the front of your scope (in this case, my Meade 8" SCT ota) face down on the triangles so you can mark the triangles with its outside diameter. The scope's mirror/lens diameter is NOT what is important here. What is important is the actual outside diameter at the front of the scope because this is where the filter will fit over. In my case the 8" scope, the largest scope I will be using the filter for.
STEP 4: Using a Sharpie pen trace the outline of the outside edge of the scope on each triangle. This shows you where your cuts on the foam are going to be.
NOTE: If you are just going to set the filter up for ONE telescope proceed to STEP 7
STEP 5: Because I wanted to make this useful with multiple telescopes of different diameters I then placed and centered my AR-127 lens cover the triangles and marked its outside edge on the triangles. In this case it was unnecessary for me put the actual AR-127 telescope on this (what a beast it is!) because the telescope cover cap was the same size as the outside diameter of the lens shade on the telescope (yours may not).
STEP 6: Now I have two sets of marks on each triangle.
If you want this filter to work with TWO sizes of telescope proceed to STEP 8
STEP 7: If you are doing this for only one scope now take each triangle out of the filter holder and cut each triangle completely through using a sharp knife (serrated edge cuts better) but don't follow the curved line, instead cut straight across from one side of the triangle to the other. Why? Because this will result in making the filter fit TIGHTLY on the scope and that is good. Why? If you cut the foam along the curved line you run the risk of a loose fit. A loose fit risks the filter falling off accidentally (a bump or the wind gust, etc). If it falls off while you are looking through the telescope you will lose your eyesight (if you are using it for visual) as well as damage your eyepiece. If your are using a camera to image the sun and it falls off you will ruin your camera.
Now, If you are doing this for only ONE telescope you can proceed to STEP 11.
STEP 8: For use with TWO different diameter scopes READ these instructions carefully BEFORE cutting! Remove the triangles and find the curved line of the smaller scope. Cut the black foam completely through using a sharp knife (serrated edge cuts better) cut straight across from one side of the triangle to the other not the curved line. Why? Because this will result in making the filter fit TIGHTLY on the scope and that is good. Why? If you cut the foam along the curved line you run the risk of a loose fit. A loose fit risks the filter falling off accidentally (a bump or the wind gust, etc). If it falls off while you are looking through the telescope you will lose your eyesight (if you are using it for visual) as well as damage your eyepiece. If your are using a camera to image the sun and it falls off you will ruin your camera.notice that the black foam is actually in two pieces glued horizontally together
STEP 9: Now you will make the cut for the larger diameter. This one is DIFFERENT: you will NOT be cutting completely through BUT ONLY DOWN through the top layer of the foam. Again, you need to cut straight across the line (not the curve) of the triangle on the larger scope line BUT ONLY DOWN through the top layer of the foam.
STEP 10: Cut horizontally across the middle of the black foam (where the two pieces of the black foam are glued together) from the cut you made for the smaller scope to where your cut ended in STEP 9. Remove the unneeded part of the foam.
STEP 11: Having made all the necessary cuts now apply the (included) double-sided foam tape to the side of the triangle that mates with the filter holder and then press the triangle with the tape to the inside of the filter holder.
DONE ! You are ready to use your solar filter!
Here are some shots of how it works for me:
Here it is on my ExploreScientific AR-127 (5" achromat refractor):

You will notice that my mod allows me to use the smaller diameter for this scope:
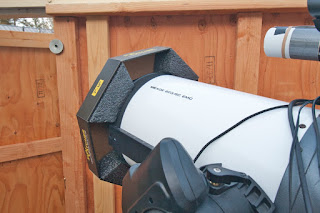
Here it is on my Meade 8" SCT ota
You can see how it only uses the larger cuts
Here is how it fits on my 6" Celestron 6SE after I have assembled the filter:


